Heat pressing is a versatile method for transferring designs onto various materials‚ offering durability and vibrant results. It’s a popular choice for customization!
What is a Heat Press?
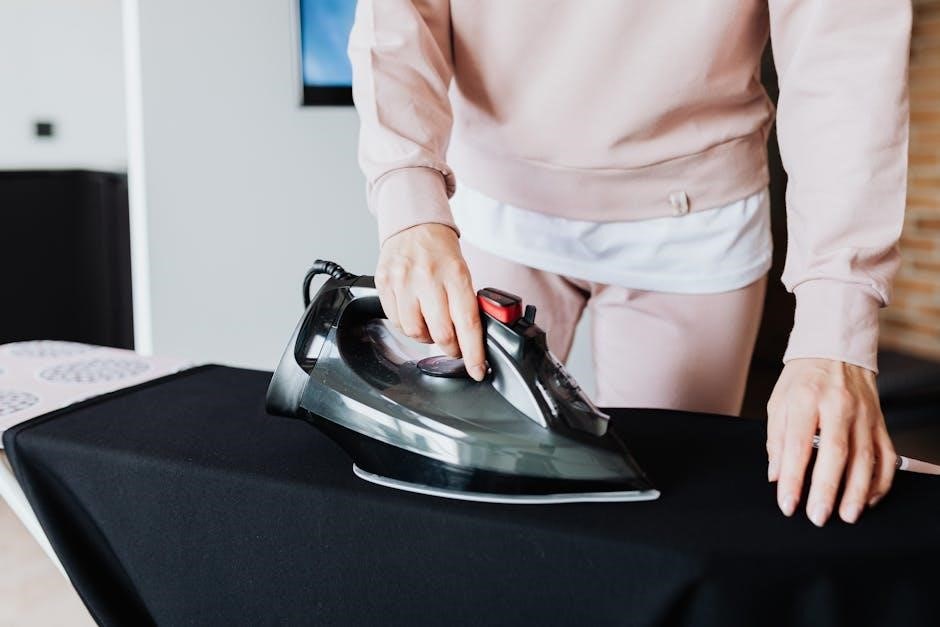
A heat press is a machine engineered to imprint designs onto substrates like fabrics or ceramics using heat and pressure. Unlike an iron‚ a heat press provides consistent‚ even heat distribution across the entire design area. This consistency is crucial for achieving professional-quality transfers. These machines utilize a heated platen – the flat‚ metal surface – that presses the transfer paper against the material.
The combination of heat‚ pressure‚ and time facilitates the bonding of the design’s ink to the fabric’s fibers‚ creating a lasting and durable image. They are essential tools for creating custom apparel‚ promotional items‚ and personalized gifts.
Types of Heat Presses
Clamshell heat presses feature a top platen that opens and closes like a clam‚ ideal for smaller workspaces. Swing-away presses move the platen to the side‚ offering safer access and accommodating thicker materials. Draw presses allow the platen to slide in and out‚ providing precise placement.
Furthermore‚ there are multi-function presses capable of handling various items like mugs and plates‚ alongside fabrics. The choice depends on production volume‚ budget‚ and the types of items you intend to personalize. Each type offers unique advantages for different applications.

Understanding Heat Press Components
Key components include the platen‚ temperature control‚ and timer. These elements work together to deliver consistent heat and pressure for successful transfers.
Platen: Size and Material
The platen is the heated surface of a heat press‚ crucial for applying even heat and pressure. Platen sizes vary significantly‚ ranging from small formats ideal for individual items like baby clothes‚ to larger sizes accommodating full-sized t-shirts or multiple smaller items simultaneously.
Common platen materials include cast aluminum and coated steel. Cast aluminum is favored for its excellent heat distribution and durability‚ ensuring consistent results across the entire transfer area. Coated steel platens offer a more affordable option‚ but may require more careful temperature monitoring to prevent hotspots. Choosing the right platen size depends on the typical projects you’ll be undertaking.
Temperature Control System
A precise temperature control system is paramount for successful heat pressing. Most modern heat presses utilize digital controllers‚ allowing for accurate temperature settings and consistent heat maintenance throughout the pressing process. These controllers often display both the set temperature and the actual platen temperature‚ providing real-time feedback.
Different transfer materials require specific temperature ranges; therefore‚ accurate control is vital to avoid scorching fabrics or causing incomplete adhesion. Some advanced systems include automatic temperature compensation‚ which adjusts for fluctuations in power supply or ambient temperature‚ ensuring consistent results every time.
Timer and Pressure Adjustment
Precise timing and pressure are crucial components of effective heat pressing‚ working in tandem with temperature. The timer controls the duration of heat application‚ preventing under- or over-pressing. Adjustable pressure ensures optimal transfer without damaging the material; too little pressure results in poor adhesion‚ while excessive pressure can distort the fabric.
Most heat presses feature adjustable pressure knobs or dials. Experimentation with different settings‚ based on fabric type and transfer material‚ is often necessary to achieve the best results. Consistent pressure application across the entire platen is essential for uniform transfer.

Preparing for Your First Heat Press
Initial setup requires a stable‚ well-ventilated workspace‚ essential materials like transfer paper and fabric‚ and a clear understanding of fabric compatibility for success.
Workspace Setup and Safety
Prioritize a dedicated‚ spacious area free from obstructions for your heat press. Ensure a stable‚ heat-resistant surface capable of supporting the machine’s weight; Proper ventilation is crucial; operate near an open window or utilize a fume extractor to dispel any potential odors or fumes released during the pressing process.
Always wear heat-resistant gloves to protect your hands from burns. Keep a fire extinguisher nearby as a precautionary measure. Be mindful of the hot platen and surrounding areas – accidental contact can cause severe burns. Never leave the heat press unattended while it’s powered on. Electrical safety is paramount; use a grounded outlet and avoid water near the machine.
Materials Needed: Transfer Paper‚ Fabrics‚ etc.
Essential materials include heat transfer paper – available in various types for light or dark fabrics – and compatible fabrics like cotton‚ polyester‚ or blends. You’ll also need your printed design‚ ideally laser-printed for best results with most transfer papers. Consider Teflon sheets or parchment paper to protect both the fabric and the heat press platen during the transfer process.
Additional helpful items are heat-resistant tape for securing the transfer‚ a lint roller to remove debris from the fabric‚ and a cutting tool for trimming excess transfer paper. Always verify fabric compatibility with your chosen transfer paper type for optimal adhesion.
Understanding Fabric Compatibility
Fabric composition significantly impacts heat transfer success. Cotton and polyester blends generally work well‚ but 100% polyester requires lower temperatures and shorter dwell times. Avoid fabrics with coatings or finishes that may melt or distort under heat. Always test a small‚ inconspicuous area first!
Dark fabrics necessitate opaque transfer paper‚ while light fabrics utilize standard options. Consider fabric weight; heavier fabrics may require increased pressure and time. Research specific transfer paper recommendations for your chosen material to ensure optimal adhesion and a lasting‚ vibrant design.

Step-by-Step Heat Press Instructions
Begin by preparing your design‚ positioning it correctly on the fabric‚ and then carefully setting the appropriate time‚ temperature‚ and pressure for optimal results.
Preparing Your Design
Before pressing‚ your design requires careful preparation. This often involves mirroring the image‚ especially when using heat transfer vinyl or sublimation. Ensure your artwork is high resolution for a crisp‚ clear transfer. For sublimation‚ designs should be created in compatible software and saved in the correct format.
Print your design onto the appropriate transfer paper‚ following the manufacturer’s instructions for ink settings and paper type. Trim away any excess paper around the design to prevent unwanted transfer onto the fabric. A well-prepared design is crucial for a professional-looking final product‚ minimizing errors and maximizing vibrancy.
Positioning the Transfer on the Fabric
Accurate positioning is key to a successful heat press. Lay your garment flat on the lower platen‚ ensuring it’s free of wrinkles. Carefully center your transfer design on the fabric‚ using a ruler or guide to ensure even placement. Consider using heat-resistant tape to secure the transfer‚ preventing shifting during the pressing process.
Double-check the alignment before closing the heat press. Incorrect positioning can ruin your project‚ so take your time. For multiple designs‚ maintain consistent spacing and alignment across all garments. Precise placement contributes significantly to the overall quality and appearance of the finished product.
Setting the Correct Time‚ Temperature‚ and Pressure
Optimal settings are crucial for proper adhesion. Refer to your transfer paper or vinyl manufacturer’s instructions for recommended time‚ temperature‚ and pressure. These vary significantly based on the material. Generally‚ higher temperatures and longer times are needed for thicker fabrics.
Start with the recommended settings and perform a test press on a scrap fabric. Adjust as needed – insufficient heat results in poor adhesion‚ while excessive heat can scorch the material. Consistent pressure is equally important; ensure even distribution across the entire transfer area for a professional finish.
The Pressing Process
Once settings are confirmed‚ carefully close the heat press. Apply firm‚ even pressure throughout the dwell time – avoid rocking or shifting the press. The timer will automatically signal completion. Gently lift the platen‚ revealing the transferred design. Do not rush this step; allow a brief cooling period before peeling‚ as indicated by your transfer type.
Consistent‚ even pressure is key. Ensure the entire design receives adequate heat and compression. A smooth‚ controlled motion when closing the press prevents misalignment and ensures a high-quality‚ durable transfer.
Post-Pressing Procedures
After pressing‚ allow the item to cool before peeling the transfer paper‚ following the manufacturer’s instructions for warm or cool peel applications.
Cool Peel vs. Warm Peel Transfers
Understanding transfer types is crucial for success. Cool peel transfers require the design to be completely cooled before removing the carrier sheet‚ ensuring optimal adhesion and preventing lifting. Warm peel transfers‚ conversely‚ are peeled while still slightly warm‚ typically within 5-10 seconds of pressing.
Incorrect peeling can ruin your project! Always consult the transfer paper’s instructions. Attempting a warm peel on a cool peel transfer‚ or vice versa‚ often results in a flawed or incomplete image transfer. Proper technique guarantees a professional‚ lasting finish.
Checking for Proper Adhesion
Post-press inspection is vital for quality control. Gently test a corner of the transfer to assess adhesion – it should be firmly bonded to the fabric. If lifting occurs‚ re-press for a few additional seconds with increased pressure. Avoid excessive force‚ which can damage both the transfer and the material.
Look for smooth‚ even coverage. Examine the entire design for any areas of incomplete transfer or bubbling. A properly adhered transfer will feel integrated with the fabric‚ not like a separate layer. Addressing adhesion issues immediately prevents future wash-related problems.
Troubleshooting Common Issues: Blurring‚ Fading
Blurring often indicates insufficient pressure or excessive movement during pressing. Ensure firm‚ even pressure throughout the entire dwell time. Fading typically stems from too low a temperature or too short a pressing duration. Verify your settings against the transfer paper’s instructions.
Check fabric compatibility; some materials require higher temperatures. Also‚ inspect the platen for uneven heating. If issues persist‚ try a different transfer paper brand or adjust the design’s resolution before printing. Consistent testing is key to optimal results!
Advanced Heat Press Techniques
Explore layering transfers for complex designs and utilize diverse transfer types like vinyl and sublimation. Mastering multiple fabrics expands creative possibilities!
Layering Transfers
Layering transfers allows for intricate‚ multi-colored designs that aren’t achievable with a single application. This technique involves applying multiple transfer sheets‚ one on top of another‚ using precise alignment and careful heat pressing. Start with a base layer‚ fully pressing it‚ then add subsequent layers‚ reducing heat and time slightly for each.
Consider using a Teflon sheet between layers to prevent unwanted adhesion. Always check compatibility between transfer types – some combinations work better than others. Proper registration marks are crucial for accurate placement. Experiment with different layering sequences to achieve desired effects‚ and remember to adjust pressure accordingly to ensure complete bonding without distortion.
Using Different Transfer Types (Vinyl‚ Sublimation)
Heat presses accommodate diverse transfer methods‚ each with unique requirements. Vinyl (HTV) adheres to a wide range of fabrics with moderate heat and pressure‚ often using a carrier sheet. Sublimation‚ however‚ requires polyester or poly-coated materials; the ink transforms into a gas and bonds with the fibers.
Sublimation demands higher temperatures and longer dwell times than vinyl. Always consult the transfer manufacturer’s instructions for specific settings. Using the correct settings prevents scorching‚ ghosting‚ or poor adhesion. Understanding these differences is key to successful heat pressing and achieving professional-quality results.
Working with Multiple Fabrics
Heat pressing diverse fabrics requires careful adjustment of time‚ temperature‚ and pressure. Polyester generally needs higher heat and shorter times than cotton. Delicate fabrics like silk or rayon demand lower temperatures and a protective cover sheet to prevent damage.
Always test a small‚ inconspicuous area first to determine optimal settings. Thicker materials may require increased pressure and dwell time for proper adhesion. Refer to fabric guides and transfer paper instructions for specific recommendations. Proper fabric preparation‚ like pre-pressing to remove moisture‚ is also crucial for optimal results.

Heat Press Maintenance and Care
Regular cleaning and calibration are vital for consistent performance and longevity of your heat press. This ensures accurate temperature and pressure control.
Cleaning the Platen
Maintaining a clean platen is crucial for preventing unwanted marks on your finished products. After each use‚ allow the platen to cool completely before cleaning. Use a soft‚ lint-free cloth dampened with isopropyl alcohol or a specialized platen cleaner. Avoid abrasive cleaners‚ as they can damage the surface. Gently wipe the platen to remove any residue from transfer paper‚ vinyl‚ or fabric. For stubborn marks‚ a plastic scraper can be used carefully; Ensure the platen is completely dry before resuming operation to guarantee optimal adhesion and prevent potential issues with your heat transfers.
Calibrating Temperature and Timer
Accurate temperature and timing are vital for successful heat pressing. Periodically calibrate your heat press using a reliable thermometer to verify the platen temperature matches the set value. Adjust as needed according to the manufacturer’s instructions. Similarly‚ check the timer’s accuracy with a stopwatch. Inconsistent timing can lead to under or over-pressing. Recalibration is especially important after extended periods of non-use or if you suspect discrepancies. Maintaining precise control ensures consistent‚ high-quality transfers and prevents wasted materials due to inaccurate settings.
Troubleshooting Mechanical Issues
Addressing mechanical problems promptly extends your heat press’s lifespan. If the platen isn’t closing evenly‚ check for obstructions or loose hardware. A failing heating element may require professional repair or replacement. Unusual noises during operation could indicate worn bearings or a faulty compressor (for pneumatic presses). Always disconnect the power before attempting any repairs. Consult the manufacturer’s documentation for specific troubleshooting steps and diagrams. Ignoring mechanical issues can lead to further damage and potentially unsafe operating conditions‚ so seek expert help when needed.
Safety Precautions
Prioritize safety by wearing protective gear‚ ensuring proper ventilation‚ and understanding emergency procedures. Avoid burns and electrical hazards during operation always!
Avoiding Burns and Electrical Hazards
Heat presses operate at high temperatures‚ presenting a significant burn risk. Always wear heat-resistant gloves and long sleeves to protect your skin. Never touch the platen during or immediately after operation. Maintain a safe working distance and be mindful of surrounding surfaces that may become hot.
Electrical safety is paramount. Ensure the heat press is properly grounded and connected to a compatible power source. Inspect the power cord regularly for damage‚ and never operate the machine with a frayed or damaged cord. Avoid contact with water or damp surfaces. If any electrical issues arise‚ immediately disconnect the power and consult a qualified technician.
Proper Ventilation
Heat pressing‚ particularly with certain materials like sublimation‚ can release fumes and odors. Adequate ventilation is crucial to maintain a safe and comfortable working environment. Operate the heat press in a well-ventilated area‚ ideally with an open window or a dedicated exhaust system.
Consider using a fume extractor if ventilation is limited‚ especially during prolonged use. This will help remove potentially harmful airborne particles. Avoid breathing in fumes directly‚ and ensure the workspace is free from obstructions that could hinder airflow. Prioritize air quality for a healthier heat pressing experience.
Emergency Procedures
In the event of a burn‚ immediately cool the affected area with cool (not cold) running water for at least ten minutes. Seek medical attention if the burn is severe or covers a large area. For electrical hazards‚ immediately disconnect the heat press from the power source before attempting any intervention.
If a fire occurs‚ use a Class ABC fire extinguisher. Know the location of fire extinguishers and first aid kits. Never use water on an electrical fire. Have emergency contact numbers readily available and ensure all operators are familiar with these procedures.

Heat Press Terminology
Key terms like PSI‚ dwell time‚ sublimation‚ and heat transfer are crucial for understanding the process and achieving optimal results with your heat press.
Understanding PSI (Pounds per Square Inch)
PSI‚ or Pounds per Square Inch‚ measures the pressure applied by a heat press during operation. It’s a critical factor influencing transfer quality; insufficient PSI results in poor adhesion‚ while excessive pressure can cause bleeding or damage to materials. Different transfer types and fabrics require specific PSI levels for optimal bonding. Generally‚ a medium PSI is suitable for most applications‚ but adjustments are often necessary.
Understanding your heat press’s PSI capabilities and how to adjust it is essential for consistent‚ professional-looking results. Always consult transfer paper instructions for recommended PSI settings.
Dwell Time Explained
Dwell time refers to the duration the heat and pressure are applied during the heat transfer process. It’s a crucial setting‚ directly impacting how well the design bonds with the fabric. Insufficient dwell time leads to incomplete transfer‚ while excessive time can cause scorching or ghosting.
Optimal dwell time varies based on the transfer type‚ fabric‚ and heat press settings. Always refer to the transfer paper manufacturer’s recommendations for specific dwell times. Precise timing ensures a vibrant‚ durable‚ and professional-quality finished product.
Sublimation vs. Heat Transfer
Sublimation and standard heat transfer are both heat-applied decoration methods‚ but differ significantly. Sublimation uses special inks that turn into a gas when heated‚ bonding with the polyester fibers – resulting in a permanent‚ wash-resistant print. Heat transfer‚ conversely‚ applies a layer onto the fabric.
Heat transfer works on a wider range of fabrics‚ while sublimation requires polyester or a poly-blend. Sublimated prints are softer to the touch‚ while heat transfers can sometimes feel heavier. Choosing the right method depends on the fabric and desired outcome.
Resources and Further Learning
Expand your knowledge through online forums‚ manufacturer support‚ and documentation. Discover recommended heat press brands for optimal results and continued success!
Online Forums and Communities
Engage with fellow heat press enthusiasts in vibrant online communities! These forums are invaluable resources for troubleshooting‚ sharing techniques‚ and discovering new applications. Platforms like Heat Press Forum and Reddit’s r/heatpress offer a wealth of knowledge from experienced users.
Benefit from collective wisdom; ask questions‚ receive feedback on your projects‚ and stay updated on the latest industry trends. Many manufacturers also host dedicated forums for their products‚ providing direct support and access to expert advice. Active participation fosters learning and accelerates your heat pressing journey.
Manufacturer Support and Documentation
Prioritize accessing official resources from your heat press manufacturer. Comprehensive instruction manuals are typically included with your machine‚ detailing setup‚ operation‚ and safety guidelines. Most manufacturers also provide extensive online documentation‚ including FAQs‚ troubleshooting guides‚ and video tutorials.
Leverage direct support channels such as email‚ phone‚ or live chat for personalized assistance. Registering your heat press often unlocks access to exclusive content and warranty support. Regularly check the manufacturer’s website for software updates‚ firmware improvements‚ and important safety notices to ensure optimal performance and longevity.
Recommended Heat Press Brands
Several brands consistently receive positive reviews within the heat pressing community. Hotronix is known for its auto-open feature and consistent heat distribution‚ ideal for high-volume production. Swingman offers a range of presses‚ from entry-level to professional‚ prioritizing durability and user-friendliness.
Geo Knight is a reputable choice for sublimation printing‚ providing precise temperature control. Hix presses are praised for their robust construction and even pressure. Always research specific models within each brand to match your needs and budget‚ and consult user reviews before making a purchase.
Leave a Reply